Sample Applications
This section introduces sample ROS 2 applications developed for the Renesas RZ/V2H RDK platform, demonstrating various functionalities and use cases.
Prerequisites for Running Sample Applications
Before running any sample application, ensure that you have completed the following common setup steps:
Set up the RZ/V2H RDK board as per RZ/V2H RDK board setup.
Complete the Development Guide steps to set up the cross-compilation environment, including setting up the Docker container and VS Code workspace.
Create and enter the container from the Docker image ghcr.io/renesas-rdk/rzv2h_ubuntu_xbuild:latest image.
Run the setup script to create the Docker-based cross-compilation environment.
wget https://github.com/renesas-rdk/ros2_demo_workspace/raw/refs/heads/main/common_utils/setup_rdk_docker.sh
chmod +x setup_rdk_docker.sh
Execute the script and follow the guide to complete the setup.
./setup_rdk_docker.sh
Enter the Docker container:
docker exec -it container_name bash
Replace
container_namewith your created Docker container name.After this step, we assume that you already know about how to cross build the ROS 2 application on RZ/V2H RDK board as well as how to deploy and run it.
The next instruction only focuses on demo-specific operation, not cover the general setup anymore.
(Optional) If you have the real robot hardware, set up the robot arm or hand according to the instructions provided in the respective sample application sections.
The following figure shows the hardware setup of the RZ/V2H RDK board and peripherals used in the sample applications:
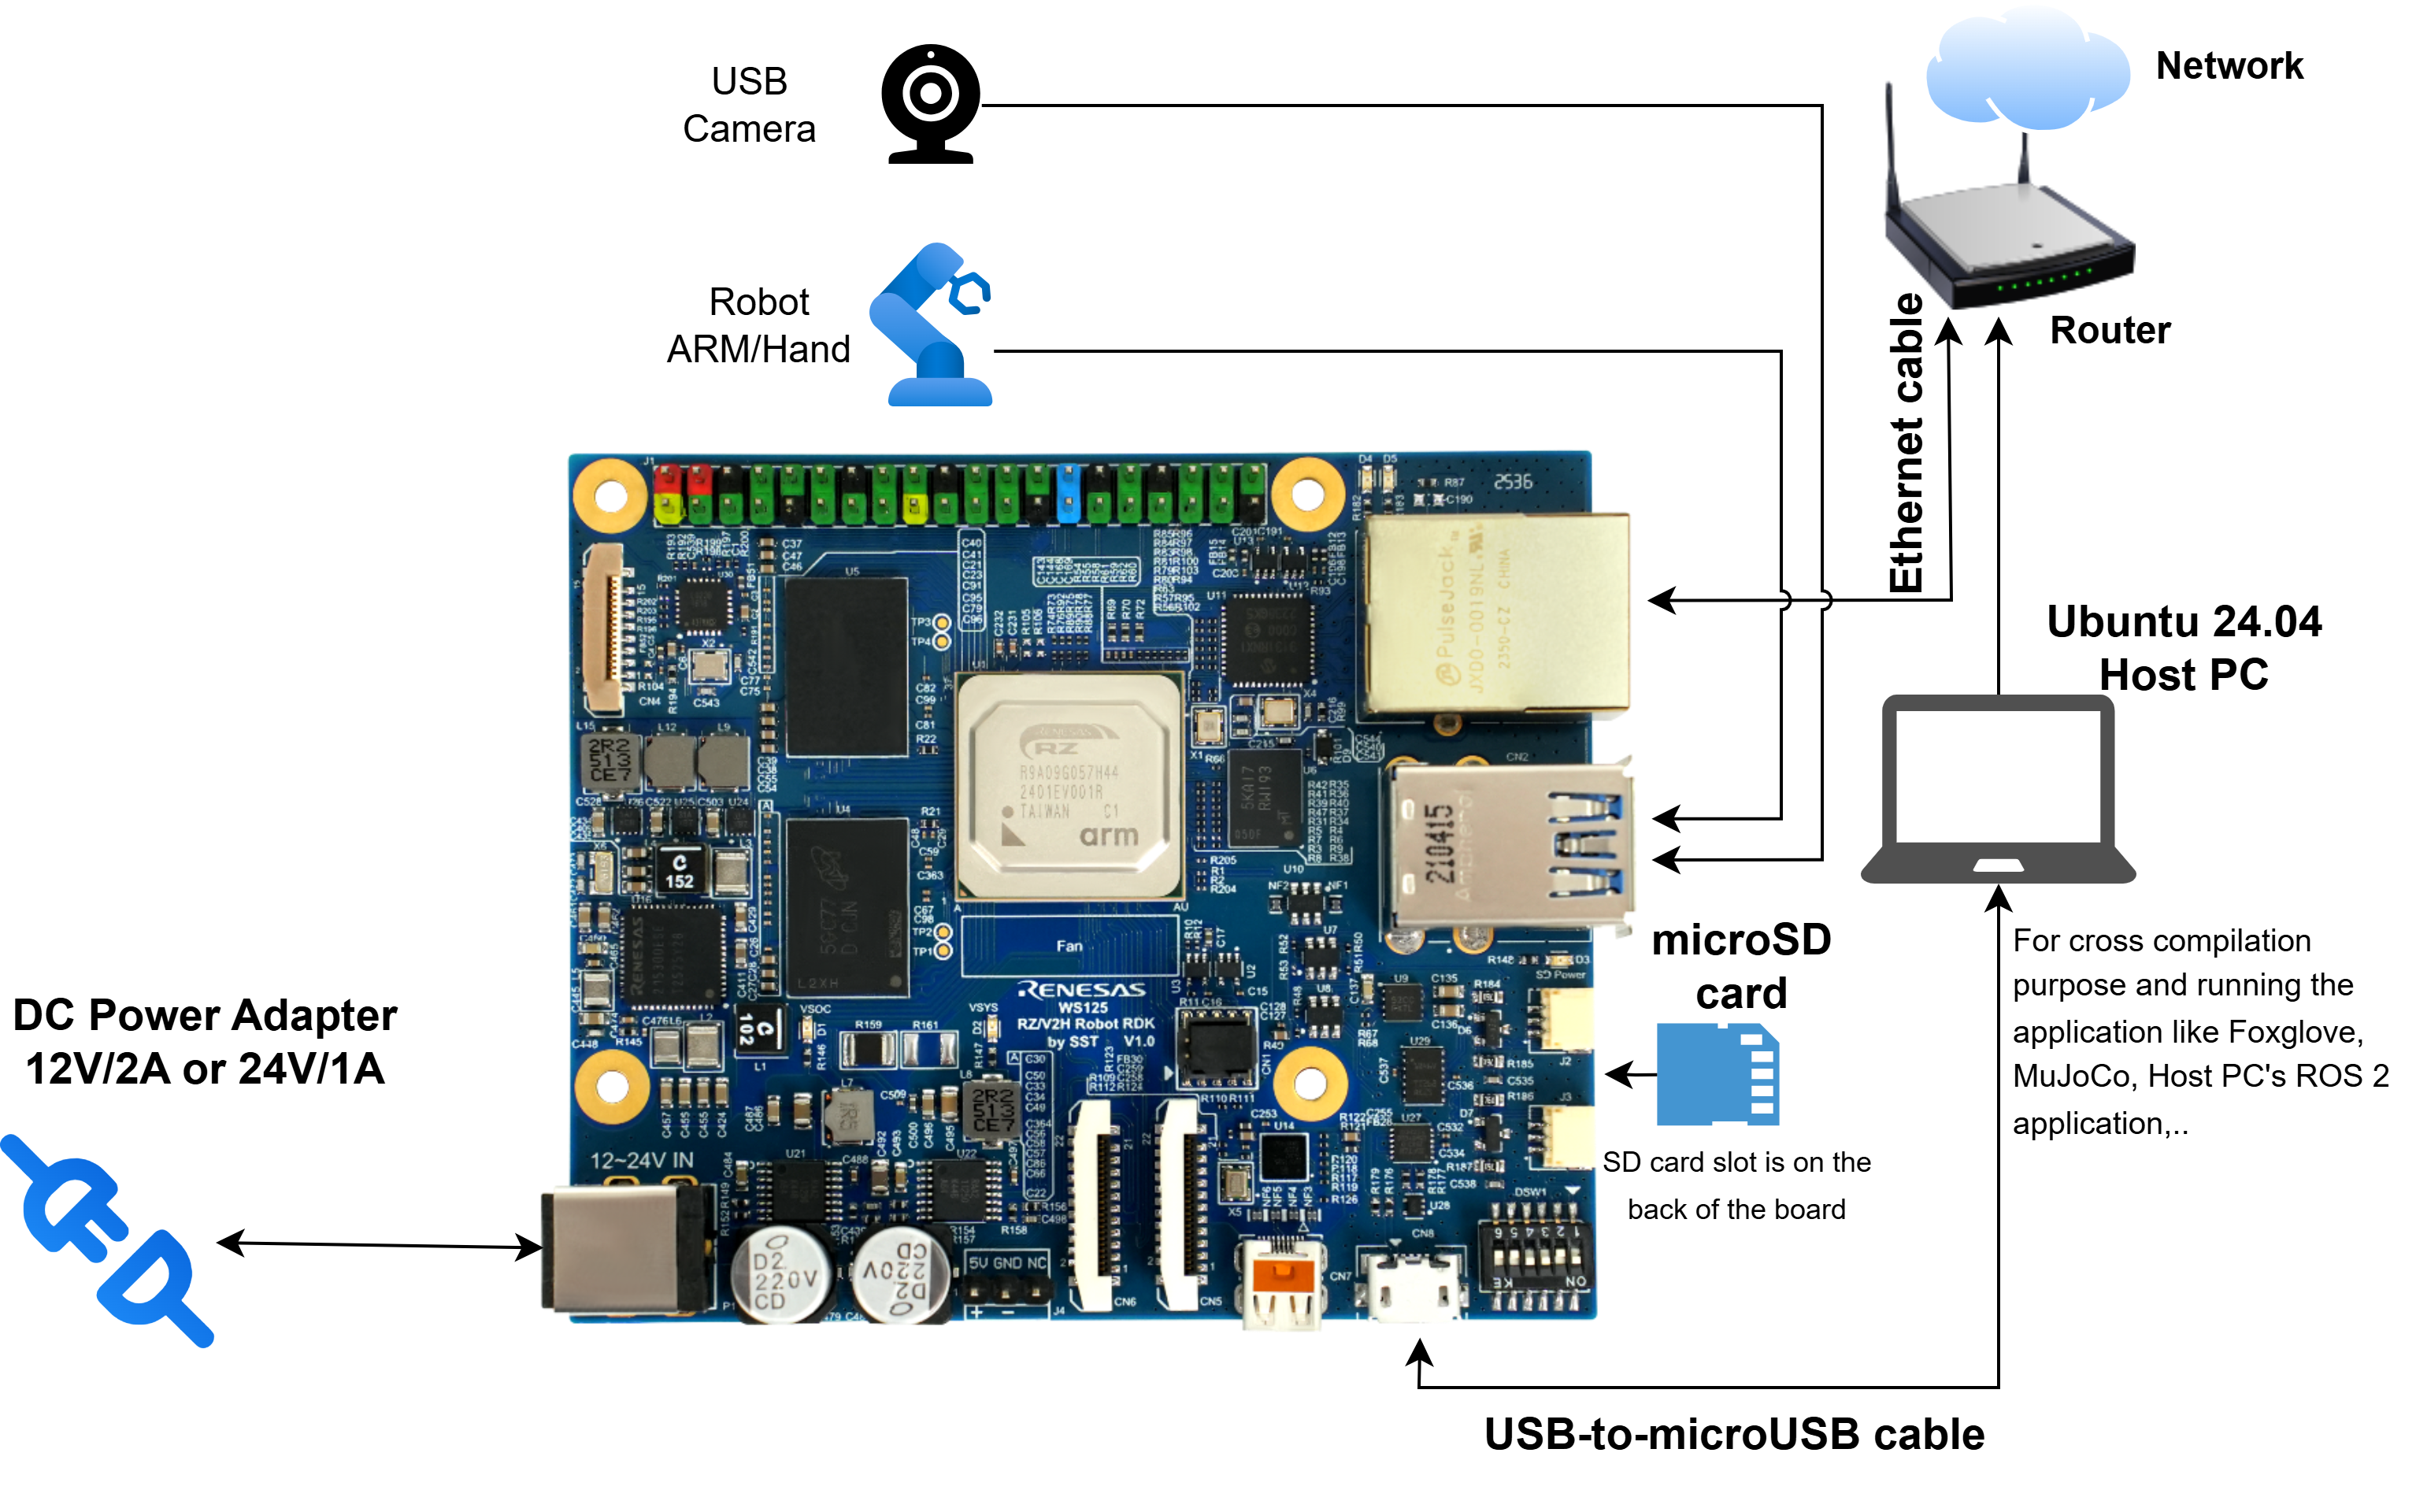
Hardware setup for sample applications on the RZ/V2H RDK board.
Tip
A physical robot arm or hand is not required for the sample applications. You can use Foxglove Studio to visualize the robot state and control the robot in a simulated environment. See Foxglove Studio Visualization for more details.
Deploying and Installing Dependencies
After cross-building, the install folder has to reach the board and the demo’s runtime
dependencies have to be installed there. The VS Code workspace does both over SSH, so neither
step needs a terminal on the board.
Using the VS Code Tasks
Make sure TARGET_IP in settings.json points at your board (see
Workspace Settings), then run the two tasks in order:
Deploy. Click the Deploy button in the status bar, or press
Ctrl+Shift+P, run Tasks: Run Task, and choose ROS2: Deploy to Target. This copies theinstalldirectory to the board.Install dependencies. Click the Install Deps button, or run the ROS2: Install Deps on Target (rosdep) task. It runs
rosdepon the board over SSH against the workspace you just deployed.
Both tasks are described in ROS 2 VS Code Workspace Configuration.
Tip
The Install Deps task only has to be re-run when a demo’s dependencies change, such as
after adding a package or editing a package.xml. Re-deploying alone is enough after a
plain source change.
Doing It Manually
If you are not using the VS Code workspace, copy the install folder to the board yourself,
then run this in your ROS 2 workspace on the board:
source /opt/ros/jazzy/setup.bash
rosdep install --from-paths install/*/share -y -r --ignore-src
Running a Demo
Source the workspace on the board before launching any demo:
source /opt/ros/jazzy/setup.bash
source install/setup.bash
The demos can also be started from VS Code with the Run LaunchFile and
Run ExecutableFile buttons, once the matching package and launch-file variables are set in
settings.json. See ROS 2 Application Deployment for that
workflow.
List of Sample Applications
Follow the instructions in the respective sample application sections to run each application on the RZ/V2H RDK platform.