Vision Based Robotic Arm Teleoperation
Note
Available for Foxglove and MuJoCo Visualization simulation environments without real robotic hardware!
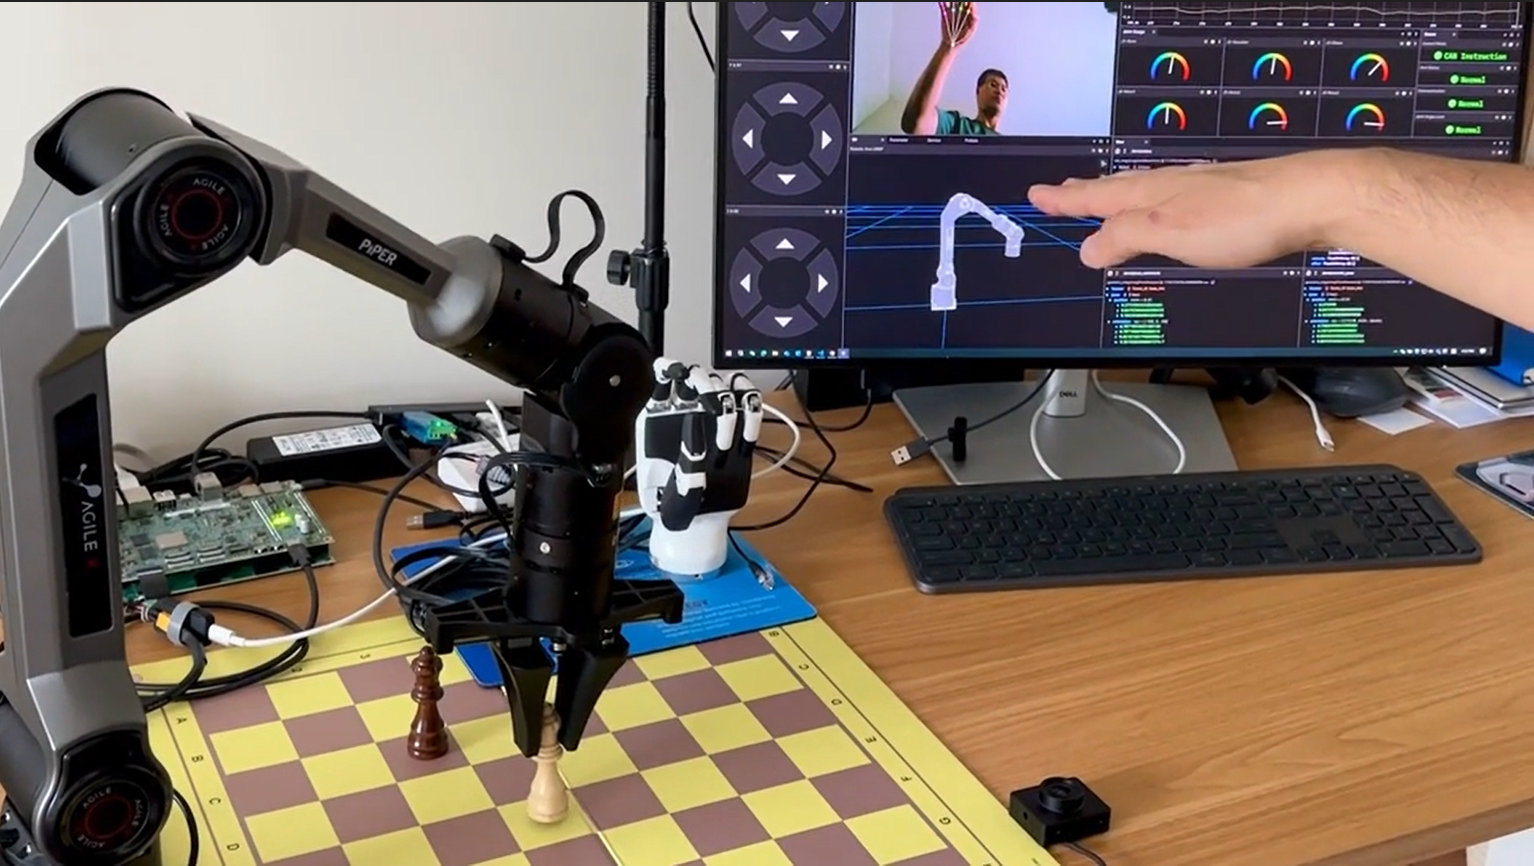
Arm Teleoperation Demo.
The RZ/V Demo Arm Teleoperation package provides the following features:
Detects hand landmarks from camera input to control the arm and gripper for grasping tasks.
Supports running two AI models simultaneously on the DRP-AI IP.
Maps hand landmarks to robotic arm and hand joint commands.
Supports control of the AgileX Piper Arm (6 DOFs) with dexterous robotic hands such as the Inspire RH56.
Supports simultaneous control of virtual and physical AgileX Piper Arm systems.
Supports visualization through Foxglove Studio and MuJoCo.
Quick hardware setup instructions
Complete the Prerequisites for Running Sample Applications.
Optional: Connect the AgileX Piper Arm and Inspire RH56 hand to the RZ/V2H RDK board if you want to control the real arm and hand.
Connect a compatible USB camera to the RZ/V2H RDK board for hand detection and landmark estimation.
The common setup uses a fixed camera facing upward.
The USB camera field of view should capture the user’s hand, and the hand must remain within the camera frame.
Quick software setup instructions
Note
All subsequent operations must be executed inside the cross-compilation Docker container, which was set up in the common setup step.
Clone the required source from GitHub by using the
vcstool inside the Docker container.Get the
ros2_demo_workspacerepository first:cd ~/ros2_ws git clone https://github.com/renesas-rdk/ros2_demo_workspace.git
Import the repositories by using the
vcscommand:vcs import < ./ros2_demo_workspace/vcs_manifests/vision_based_robotic_arm_teleoperation.target.lock.repos
It will clone all required repositories to the
./srcfolder.Cross-compile the ROS 2 workspace and deploy it to the RZ/V2H RDK board.
Update the APT repository list in the target sysroot.
arm64-chroot apt update
Install the dependencies to the target board first:
sysroot-rosdep-install
It will take time if you run this command for the first time.
Cross-build the application:
cross-colcon-build
Deploy the binaries to the target board:
scp -r install ubuntu@board_ip:~/ros2_ws/
Note
Replace
board_ipwith the actual IP address of your board. Ensure that theros2_wsdirectory exists at/home/ubuntuon the target board before running thescpcommand.
Start the application
Install the required dependencies on the RZ/V2H RDK board.
cd /home/ubuntu/ros2_ws
source /opt/ros/jazzy/setup.bash
rosdep install --from-paths ./install/*/share -y -r --ignore-src
The
/home/ubuntu/ros2_wsdirectory is the location where you copied the cross-compiled workspace on the board.Launch the Vision Based Robotic Arm Teleoperation application.
Load the workspace environment:
source /opt/ros/jazzy/setup.bash
source ./install/setup.bash
For real AgileX Piper Arm and Inspire RH56 hand control:
ros2 launch rzv_playground hand_palm_pose_teleop_inspire_hand.launch.py use_mock_hardware:=false
For real AgileX Piper Arm with a compatible gripper:
ros2 launch rzv_playground hand_palm_pose_teleop_piper_gripper.launch.py use_mock_hardware:=false
For virtual hand control with Foxglove (without a real arm):
ros2 launch rzv_playground hand_palm_pose_teleop_inspire_hand.launch.py use_mock_hardware:=true
For virtual hand control with MuJoCo (without a real arm):
ros2 launch rzv_playground hand_palm_pose_teleop_piper_gripper.launch.py \
   bringup_launch_file:=agilex_piper_mujoco_cartesian_control.launch.py
Make sure to check the correct CAN interface and serial port parameters in the launch files before running the above commands.
Visualize the robotic arm and hand movements by following the instructions below:
Move your hand up or down and the Piper arm will move up or down accordingly.
Move your hand forward or backward and the Piper arm will move forward or backward.
Move your hand left or right and the Piper arm will move left or right.
Close your thumb and the robotic hand or gripper will switch to the grasping position.
If the system cannot detect your hand after a certain period, the Piper arm will reset to its initial position.
Set up visualization.
For Foxglove Studio, refer to the Foxglove Visualization section for setup instructions. The input layout file for Foxglove Studio is located at
rzv_playground/config/foxglove/*.jsoninside the ROS 2 workspace.For MuJoCo simulation, refer to the MuJoCo Visualization section for setup instructions. After setting up the MuJoCo environment, visualize the robotic arm and hand movements in the MuJoCo simulator on your host PC:
source /opt/ros/jazzy/setup.bash
source ./install/setup.bash
ros2 launch agilex_piper_mujoco bringup_mujoco_cartesian_motion_controller.launch.py
Note
Make sure to set up the MuJoCo environment on your host PC as described in the MuJoCo Visualization section before running the above command.
For more details about the Vision Based Robotic Arm Teleoperation application, refer to the README.md in the rzv_playground package.
v1.0.0 (2026-03-31): Initial release of the Vision Based Robotic Arm Teleoperation sample application.