Booting RZ/V2H RDK from SSD
The advantages of booting from an SSD include faster read/write speeds, improved performance, and increased storage capacity compared to booting from an SD card.
Hardware Required
RZ/V2H RDK set.
SD card (for initial bootloader storage). Please flash the SD card with the RDK image.
M.2 NVMe SSD.
Hardware Connection
The following image shows how to connect the SSD to the RZ/V2H RDK using the PCIe TO M.2 Board:
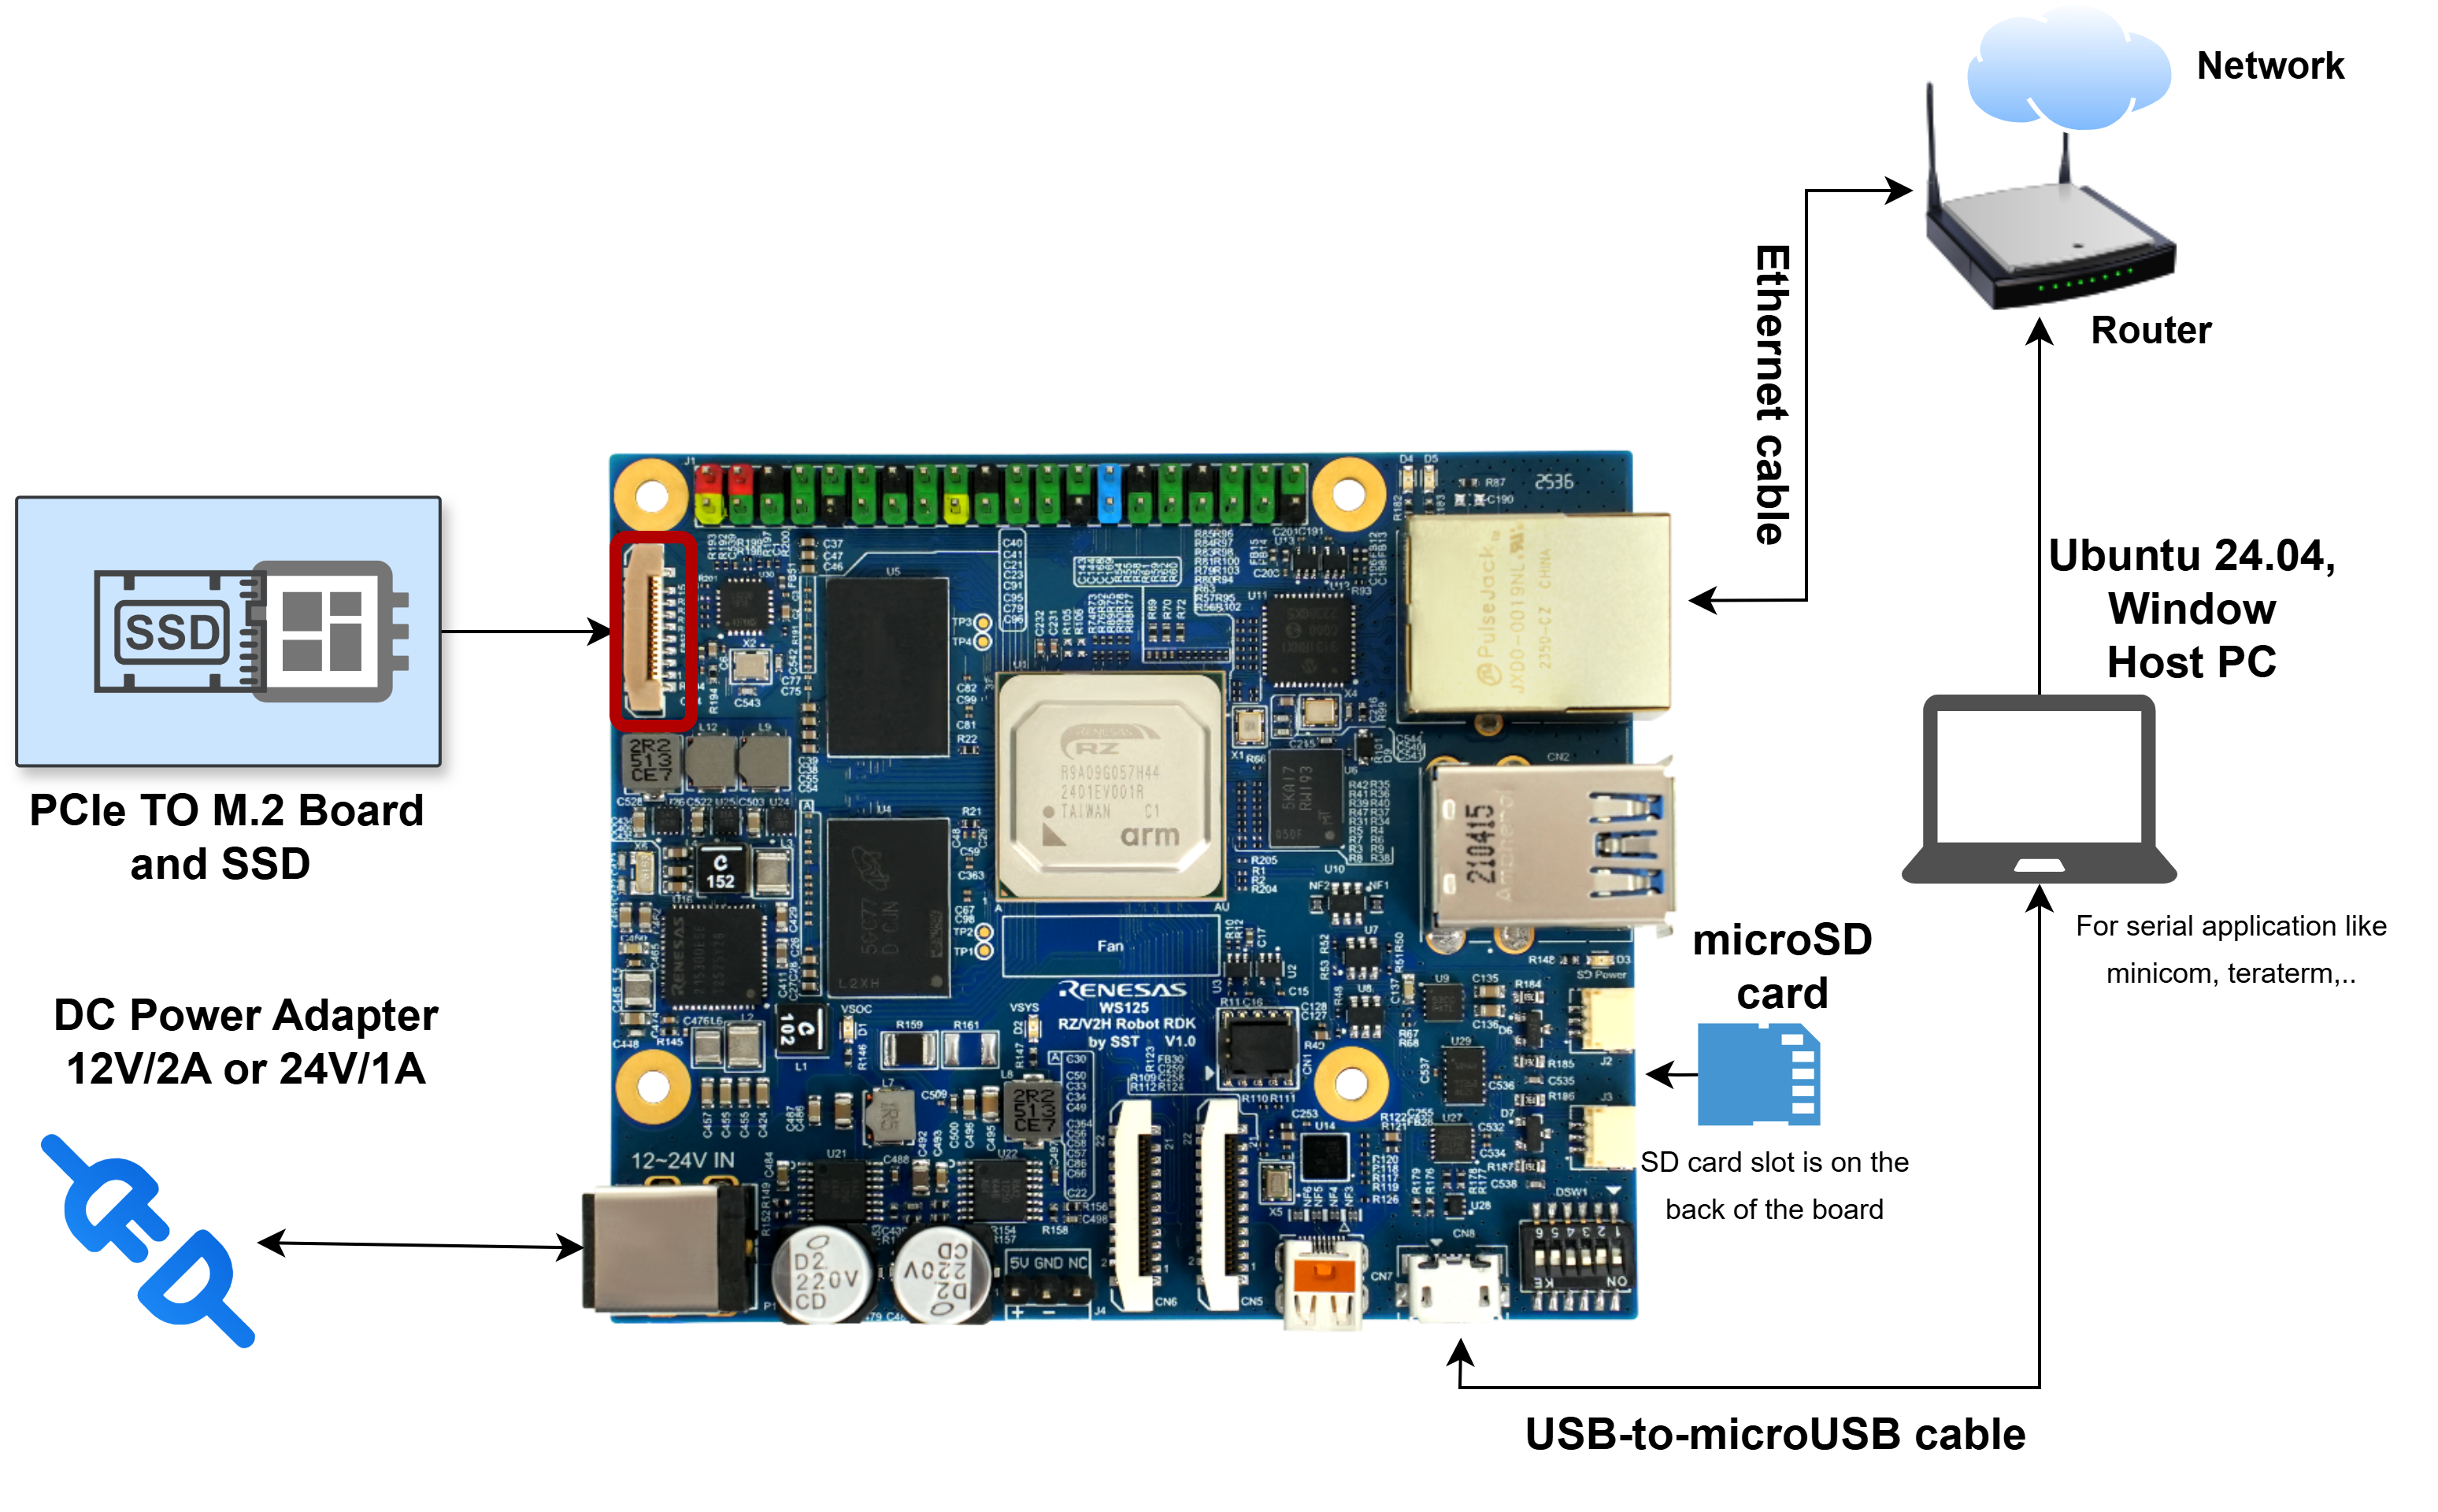
SSD Connection Diagram
Detail Steps
Important
Make sure to back up any important data on the SSD before proceeding, as the following steps will erase all existing data on the SSD.
Connect the SSD to the PCIe TO M.2 Board before powering on the RZ/V2H board.
Make sure that you connect the PCIe TO M.2 Board to the correct PCIe 3.0 16-pin connector on the RZ/V2H RDK.
Handle the M.2 NVMe SSD with care to avoid damage from static electricity.
Note
The following steps assume that the SSD is detected as /dev/nvme0n1.
If your system detects the SSD with a different device name, replace /dev/nvme0n1 accordingly in the commands and examples.
Prepare the SSD:
Insert the M.2 NVMe SSD into the PCIe TO M.2 Board.
Connect the PCIe TO M.2 Board to the RZ/V2H RDK.
Boot from the SD card:
Insert the SD card with the Ubuntu image into the RZ/V2H RDK and power it on.
Ensure that the system boots successfully from the SD card.
Install the required tools:
sudo apt update
sudo apt-get install bmap-tools
Partition and format the SSD:
Once booted from the SD card, open a terminal.
Make sure the SSD is recognized by running:
lsblk
Identify the SSD device, for example
/dev/nvme0n1.Copy the
ubuntu-24.04-server-arm64-rzv2h-rdk.img.xzfile and theubuntu-24.04-server-arm64-rzv2h-rdk.img.bmapfile to the target board.# Copy the image file to the target board scp ubuntu-24.04-server-arm64-rzv2h-rdk.img.xz ubuntu@<rzv2h_rdk_ip>:/home/ubuntu/ # Copy the bmap file to the target board scp ubuntu-24.04-server-arm64-rzv2h-rdk.img.bmap ubuntu@<rzv2h_rdk_ip>:/home/ubuntu/
Flash the root filesystem image to the SSD by running:
# Please change the device name if your SSD is recognized with a different name.
sudo bmaptool copy ubuntu-24.04-server-arm64-rzv2h-rdk.img.xz /dev/nvme0n1
Configure the bootloader to boot from the SSD:
Open and edit the
/boot/uEnv.txtfile.Change the
mmc_argsline to the following:mmc_args=setenv bootargs 'rw rootwait earlycon root=/dev/nvme0n1p2'
Note that
/dev/nvme0n1p2is the partition on the SSD where the root filesystem is located. If your SSD has a different partition layout, adjust the partition number accordingly.Reboot the system to apply the changes.
Verify booting from the SSD:
Once the system boots up, log in.
Verify that the root filesystem is mounted from the SSD by checking the location of the root filesystem
/:lsblk
Resize the filesystem if necessary:
If the SSD has a larger capacity than the original root filesystem image, you may want to resize the filesystem to use the full capacity of the SSD.
Use the following commands to resize the filesystem:
sudo apt update
sudo apt install -y parted
sudo parted /dev/nvme0n1 resizepart 2 100%
sudo resize2fs /dev/nvme0n1p2