Ubuntu Desktop with RZ/V2H RDK
Ubuntu Desktop is supported together with the RZ/V2H RDK environment.
Main points:
Ubuntu Desktop environment is available on RZ/V2H RDK
GUI-based operation is supported
Can be used for development and evaluation
Suitable for desktop-style workflows on the board
This guide walks you through setting up Ubuntu Desktop on the RZ/V2H RDK.
Prerequisites
RZ/V2H RDK
SD card with the Ubuntu image flashed. Please refer to the Quick Setup Guide for instructions on how to prepare the SD card.
Monitor and micro-HDMI to HDMI cable
Internet connection
Detail Steps
The following sections provide detailed steps to set up and use the Ubuntu Desktop environment on the RZ/V2H RDK.
Hardware Connection
Connect the RZ/V2H RDK to a monitor using the micro-HDMI interface, and ensure that the board is powered on.
The following figure illustrates the typical desktop setup for the RZ/V2H RDK:
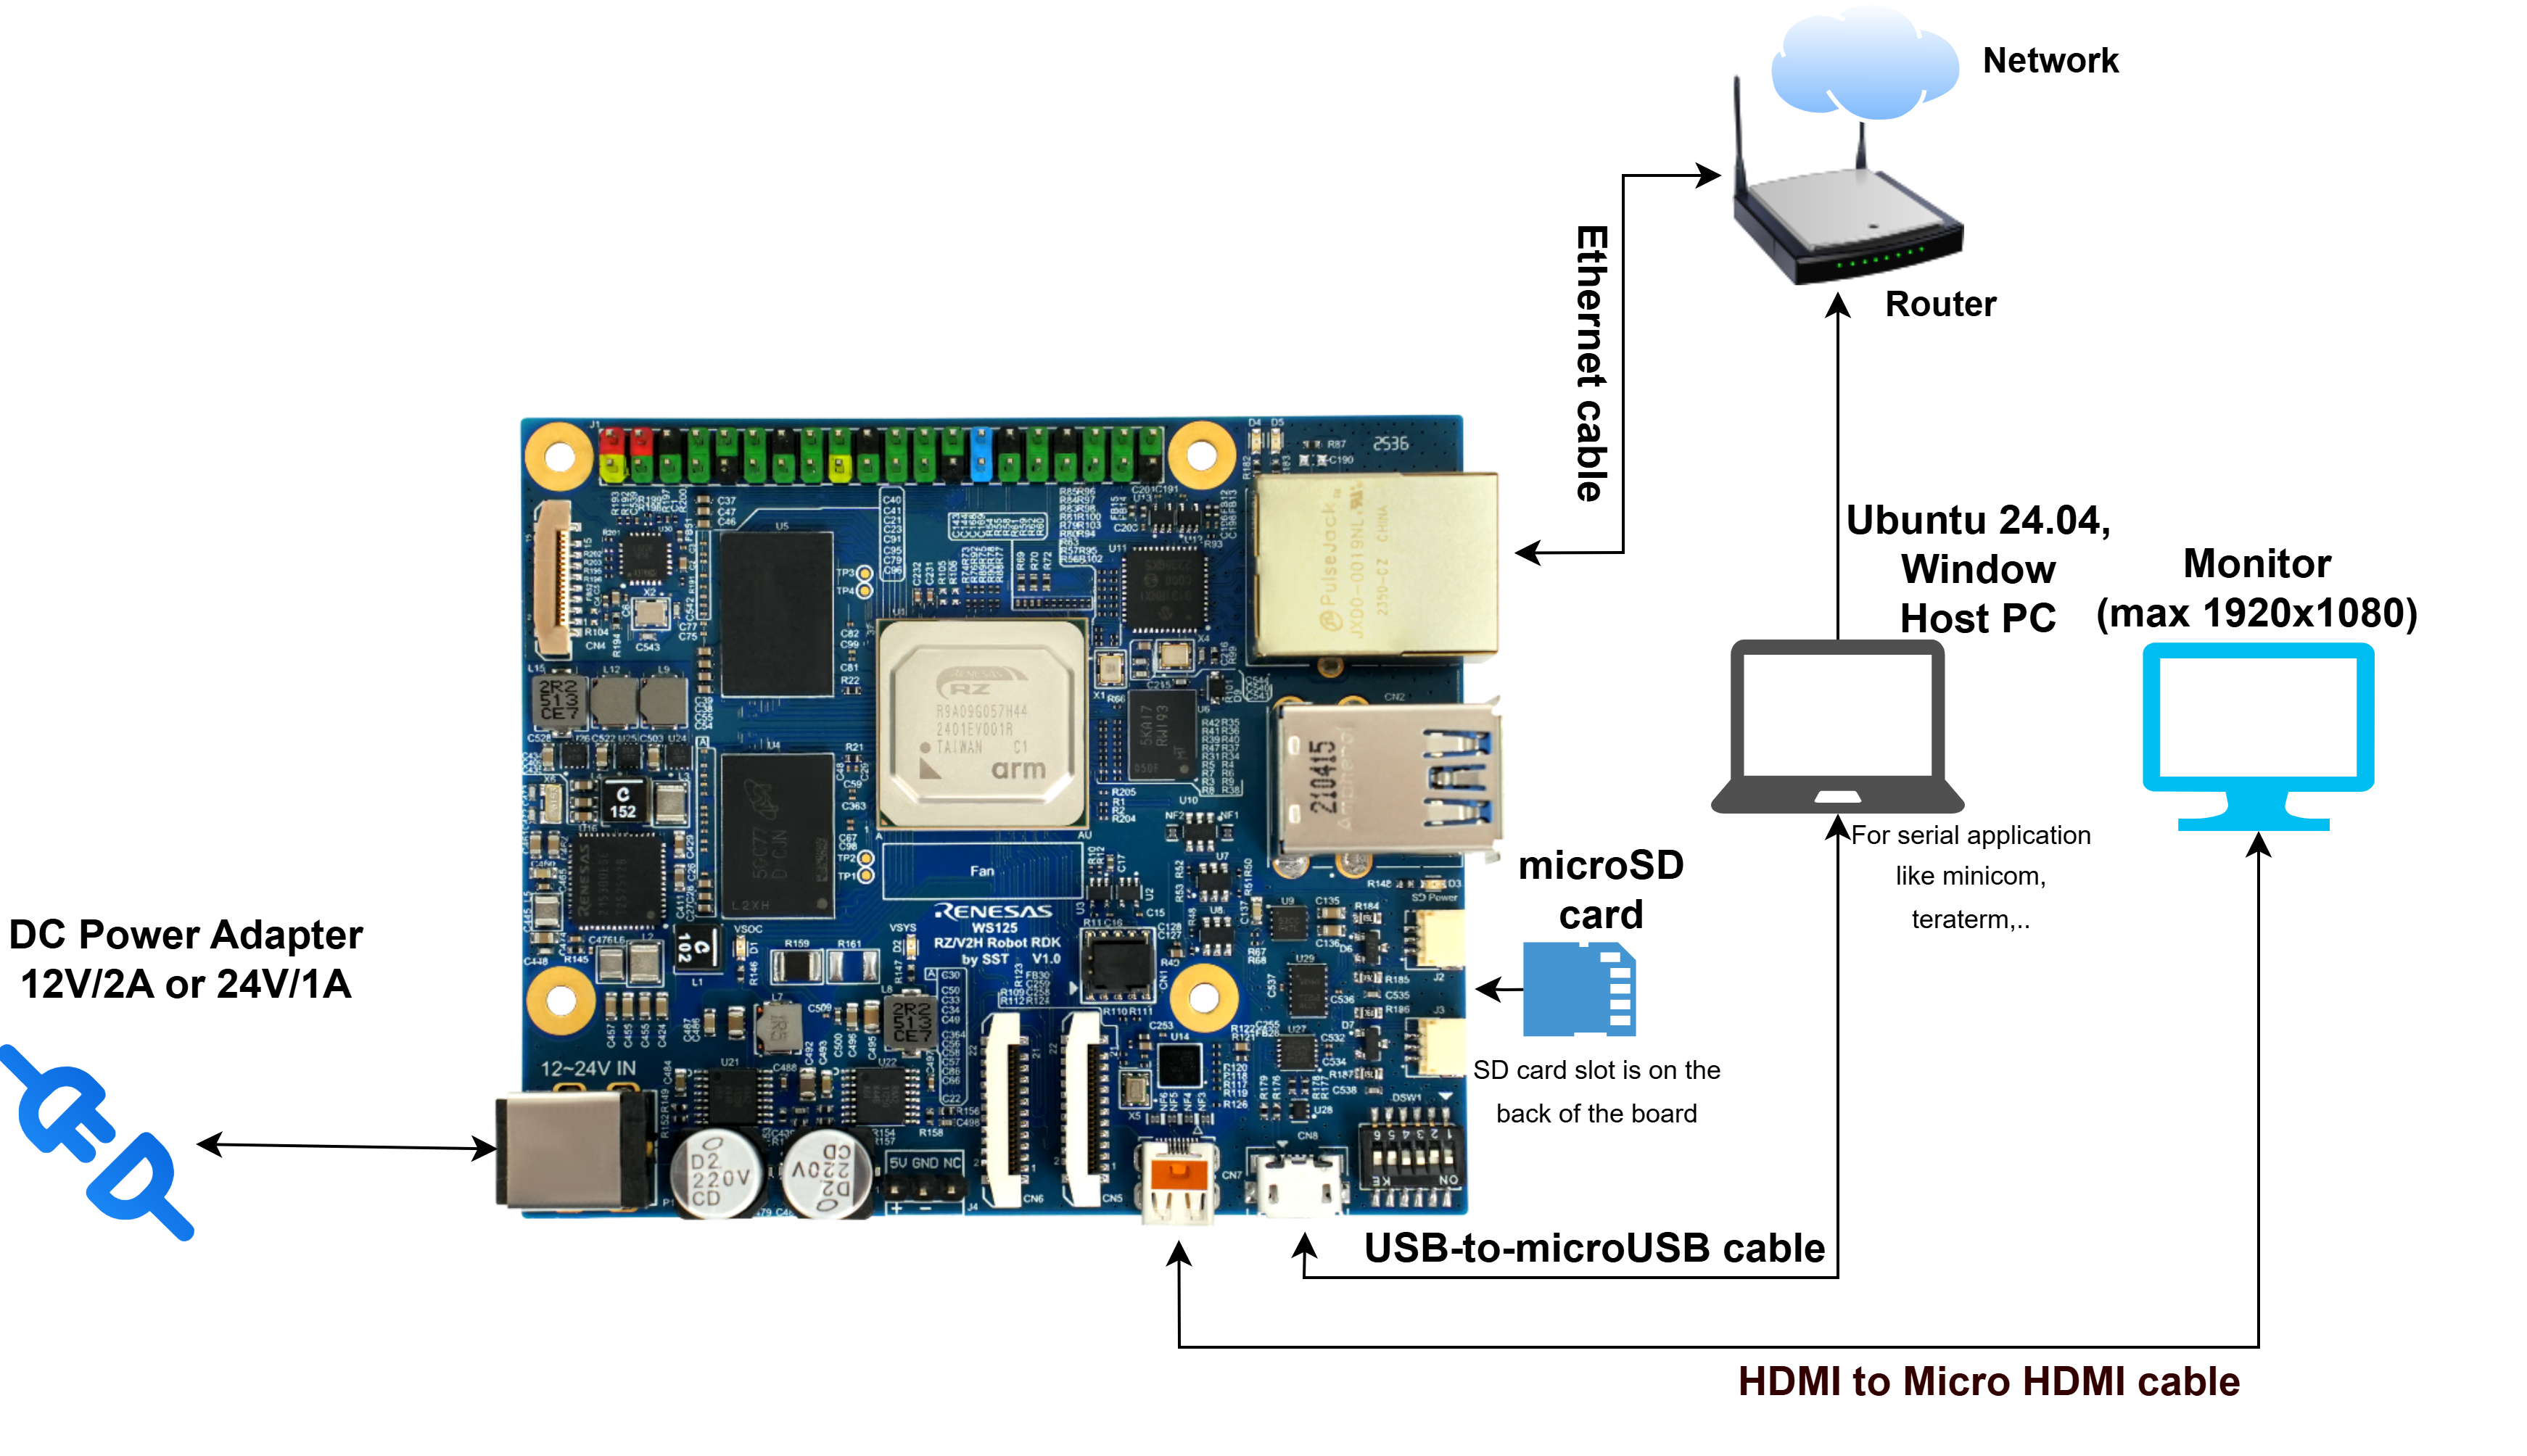
RZ/V2H RDK Desktop Setup
Boot the Board
Insert the flashed SD card into the RZ/V2H RDK board.
Set the boot option to SD card boot mode. The dip-switch 1 status from 1 to 5 should be ON-OFF-ON-ON-OFF.
Power on the board.
Initial Boot and Login
At boot, the Weston screen is displayed.
Login information:
User: ubuntu
Password: ubuntu
Disable Weston Service
Disable and mask the Weston service to prepare for desktop installation:
# Stop Weston service and related services
sudo systemctl stop weston.service weston-socket-fix.path weston-socket-fix.service

# Disable Weston service and related services
sudo systemctl disable weston.service weston-socket-fix.path weston-socket-fix.service

# Mask Weston service and related services to prevent them from being started by other services
sudo systemctl mask weston.service weston-socket-fix.path weston-socket-fix.service
Expand Root Filesystem
Expand the root filesystem using the parted tool to use the full SD card capacity.
If you have already expanded the root filesystem, you can skip this step.
# Install parted tool and resize partition
sudo apt update
sudo apt install parted

# Check current disk usage before resize
df -h

# Resize partition to 100% of disk
sudo parted /dev/mmcblk0 resizepart 2 100%

# Resize the filesystem
sudo resize2fs /dev/mmcblk0p2
Install Ubuntu Desktop
Install the minimal Ubuntu desktop environment:
sudo apt install ubuntu-desktop-minimal --no-install-recommends -y
For a better user experience, you can also install additional packages such as fonts and fontconfig:
sudo apt install -y \
   fonts-ubuntu \
   fonts-ubuntu-console \
   fonts-dejavu-core \
   fonts-dejavu-extra \
   fonts-liberation \
   fonts-liberation2 \
   fonts-noto-core \
   fonts-noto-extra \
   fonts-noto-cjk \
   fonts-noto-color-emoji \
   fonts-noto-mono \
   fonts-open-sans \
   fonts-roboto \
   fonts-freefont-ttf \
   fonts-droid-fallback \
   fontconfig
Complete Setup
Reboot the device to start using Ubuntu Desktop:
sudo reboot
Notes
Ensure a stable internet connection during desktop installation.
The installation process may take some time depending on internet speed.
After installation and reboot, you should see the Ubuntu Desktop environment instead of Weston.
Troubleshooting
If boot fails, verify that SD card boot mode is correctly set.
For installation issues, check internet connectivity and available disk space.
Switch from networkd to NetworkManager
The default network manager for the Ubuntu image on RZ/V2H RDK is networkd.
If you want to switch to NetworkManager to support graphical network management, follow the steps below:
Note
Use the serial console for the operations below, as switching to NetworkManager may cause the network connection to drop temporarily, which can affect SSH access.
On the serial console, enter sudo mode:
sudo -iStop and disable
networkd:systemctl stop systemd-networkd systemctl disable systemd-networkd systemctl mask systemd-networkd
Install NetworkManager:
apt update
apt install network-manager
Check status:
systemctl status NetworkManager
nmcli device status
If NetworkManager is running and the network interfaces are listed, proceed to the next step.
Otherwise, enable and start NetworkManager:
systemctl unmask NetworkManager
systemctl enable NetworkManager
systemctl start NetworkManager
Back up the netplan configuration and edit it to use NetworkManager as the renderer:
cp -a /etc/netplan/50-cloud-init.yaml /etc/netplan/50-cloud-init.yaml.bak
Edit the netplan file. For example:
vi /etc/netplan/50-cloud-init.yamlChange:
renderer: networkd
to:
renderer: NetworkManager
Example:
network:
  version: 2
  renderer: NetworkManager
  ethernets:
    end0:
      dhcp4: true
Apply netplan:
netplan apply